Extending and customizing Google Code project hosting
I've used Google Code project hosting for almost every project I've started in the last few years. It's really great and I love both the Web UI and all the functionality-related features (which Google is continuously extending). However, one aspect in which I've found Google Code project hosting strangely lacking is customizability and extendability in adding rich content and even external applications to a project site. Wouldn't it be great if we could add a special "Testing" and "Group discussion" tab or an easy way to embed presentations and JavaScript code into wiki pages? This would boost the usability of project sites and make the visitor experience so much better.
So, I’ve been thinking about this idea and playing with hacks and workarounds for extending Google code sites for my projects, and what I’ve discovered is that I’m not alone - several other projects have been doing this also. So in this post I’ll try to cover two approaches to extending and customizing Google Code project hosting: embedding 3rd party content using Google Gadgets and viewing non-source files in the repository using the SVN mime-types property.
The first idea for extending project sites is to embed 3-rd party content into wiki pages (Google Docs presentations, JavaScript programs and such). Although it is possible to use a large subset of HTML in project wiki pages, <iframe> and <script> tags are not available. However, embedding Google Gadgets is supported. Google Gadgets are “ simple HTML and JavaScript applications that can be embedded in webpages and other apps” (think clock, calendar, twitter and similar widgets) and are, in essence, an HTML <iframe> embedded in the parent page. Although there is a public directory of existing Gadgets which you could add to your wiki pages, what’s more interesting is that you can build a Gadget yourself and that it’s really easy to do. So, finally, the first idea for extending Google Code project hosting is to build your own Google Gadgets which wrap the content you want to embed in your wiki page. Here’s what you need to do:
- Create a file containing a blank, content-less XML Gadget specification -- you can just copy/paste the code from the Google Gadgets tutorial.
- Define the content of the Gadget. Depending on what you want to embed in your wiki page, there are two ways to go here:
- If you want to embed an existing web page or rich content available on the Web, the content of the Gadget will be a single <iframe> element with the src attribute pointing to the URL of that web-page.
- If you want to embed content which does not exist on the web, you will have to write the HTML + JavaScript code that defines that content yourself and inline it in the Gadget. Be sure to check out the Google Gadgets developer guide.
- Save and upload the Gadget XML specification file into your project repository.
- Edit one of your wiki pages and create a Google Gadget element that references the URL of the uploaded specification. Note that you must reference the raw-file URL of the XML spec which you can get by viewing the uploaded file in your project's Source tab and then clicking "View raw file" under File info.
|
|
|
|
|
|
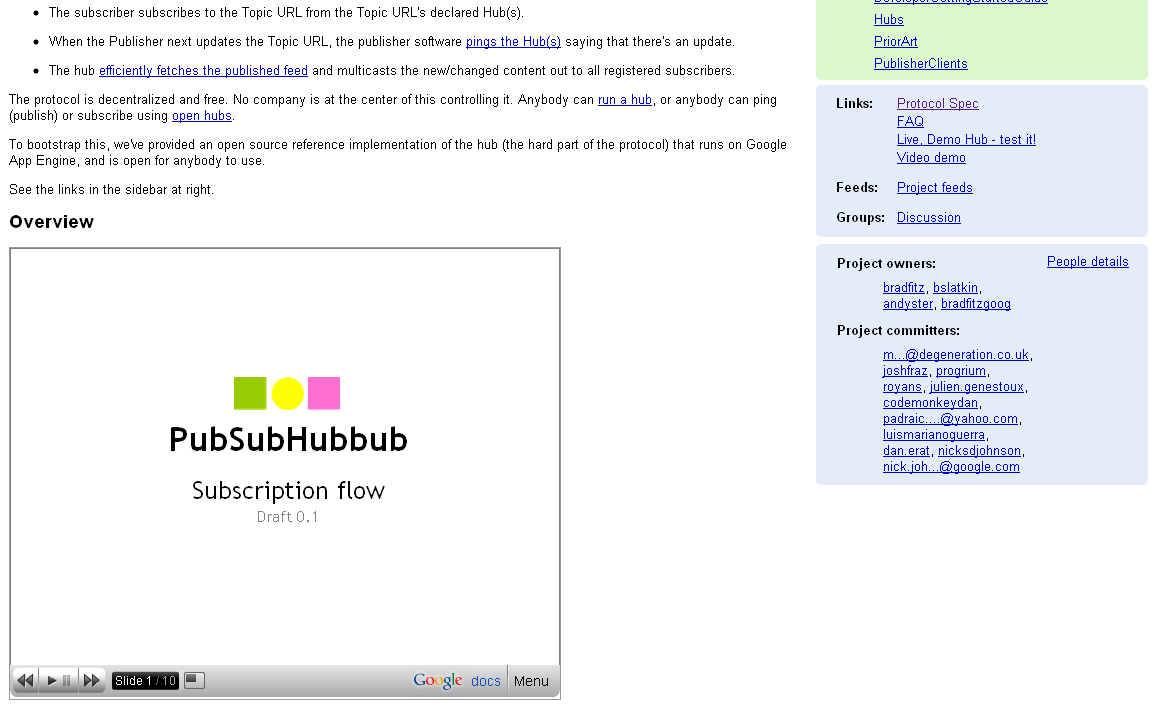
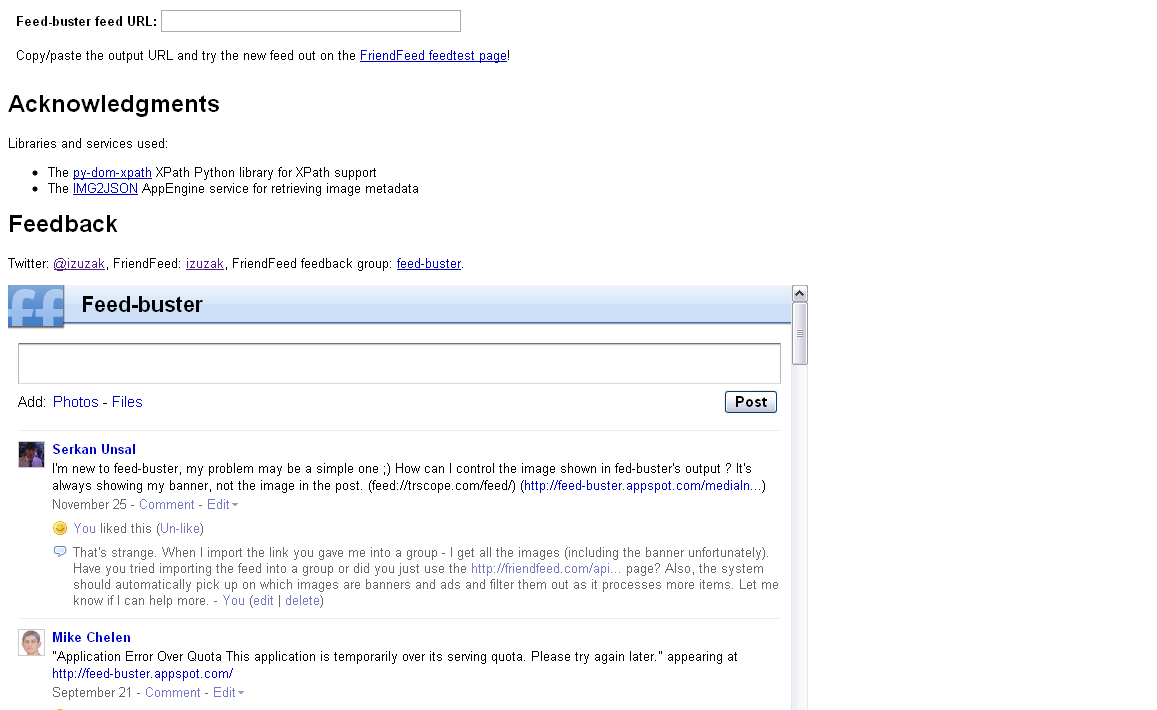
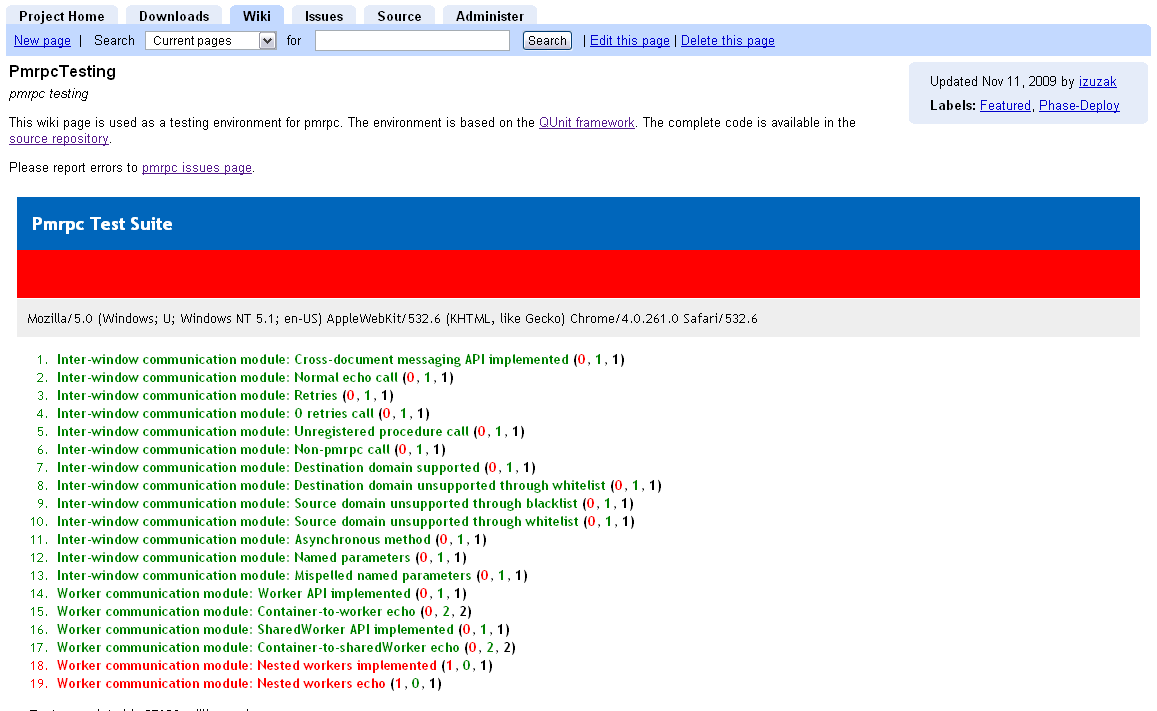
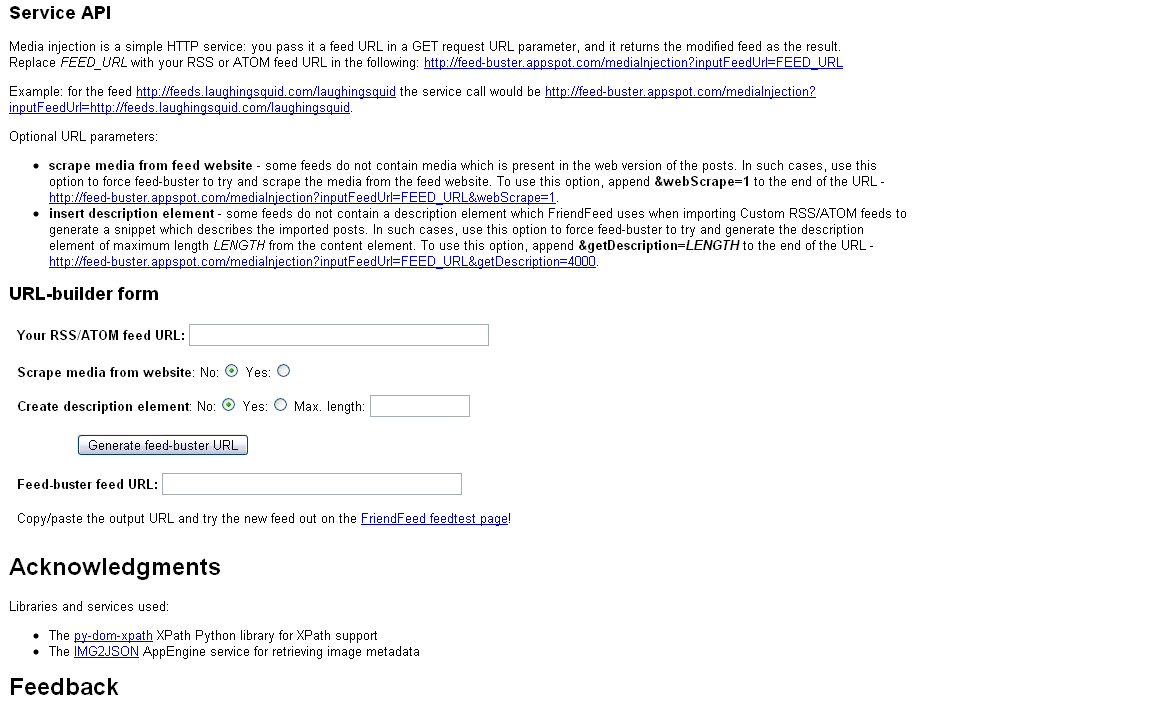
And here are some examples that show the usefulness of this approach (images above, in order of appearance):
- Embedding Google Docs presentations that visually explain details of your project (example project wiki page and XML spec). To get a Google Docs URL which you can use for embedding, go the presentation's page in Google Docs, click "Share - Publish/Embed", and copy the URL under "Your document is publicly viewable at:".
- Embedding a FriendFeed discussion groups for in-place discussions (example project wiki page and XML spec -- if you see a blank page, view the source of the page). To get a FriendFeed group URL which you can use for embedding, use the official FriendFeed instructions (basically, it's http://friendfeed.com/GROUP_NAME_HERE/embed e.g. http://friendfeed.com/feed-buster/embed).
- Embedding QUnit testing pages for following project stability and cross-browser testing (example project wiki page and XML spec). This one is a bit complex -- first you'll need to create and upload a HTML page containing the QUnit test page (setting the mime-type property to text/html using instructions below) into your repository, and then link to the raw page URL in the <iframe> inside your Gadget.
- Embedding dynamic content and forms (example project wiki page and XML spec). There is no outside content in the Gadget spec here, everything is in the Gadget. Note that the XML spec in the example also contains CSS styles so that the Gadget content has the same look-and -feel as the rest of the wiki page so visitors won't event know that a Gadget is there.
The second idea for extending project sites involves using the source repository for hosting non-source files which will be viewed by project site visitors. This is useful if you want the freedom of creating custom web pages (not embed them into project wikis) and if you want to keep all those files in the project repository (and not on some other server). The idea here is to use the raw-file URL for files in the repository - visiting the raw-file view URL returns only the content of the file without the UI stuff of Google Code. The problem is that, by default, any file uploaded to the repository is attributed to be of type text, so when you view the raw-file URL in the browser you get the content as text, which is useless if you want to see a HTML page. The good thing is that using custom SVN per-file properties it is possible to set the type of the file when it is uploaded in the repository. So, finally, the second idea for extending Google Code project hosting is to upload your content files into the repository and explicitly set their mime-types to the correct value. Here’s what you need to do :
- Create your content and save it into a file on your hard drive in the project repository folder.
- Right-click the file and under TortoiseSVN -> Properties click "New". In the "Property name" drop-down list choose "svn:mime-type" and ender the correct mime type for that file. You can find a list of all mime types here. E.g. for HTML pages it's "text/html" (this is for TortoiseSVN, command-line version is here).
- Upload the file to the repository.
- Obtain the URL to the raw-file by viewing the uploaded file in your project's Source tab and then clicking "View raw file" under File info.
- Create a link to the obtained URL from one of your wiki pages.
|
|
|
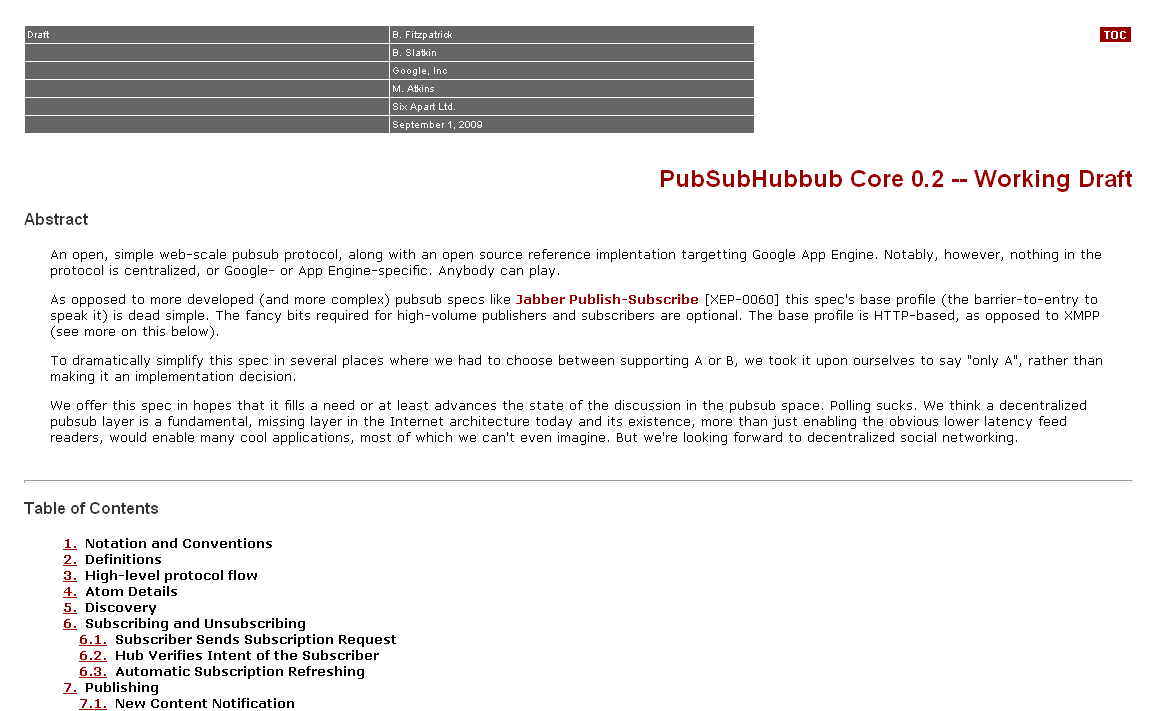
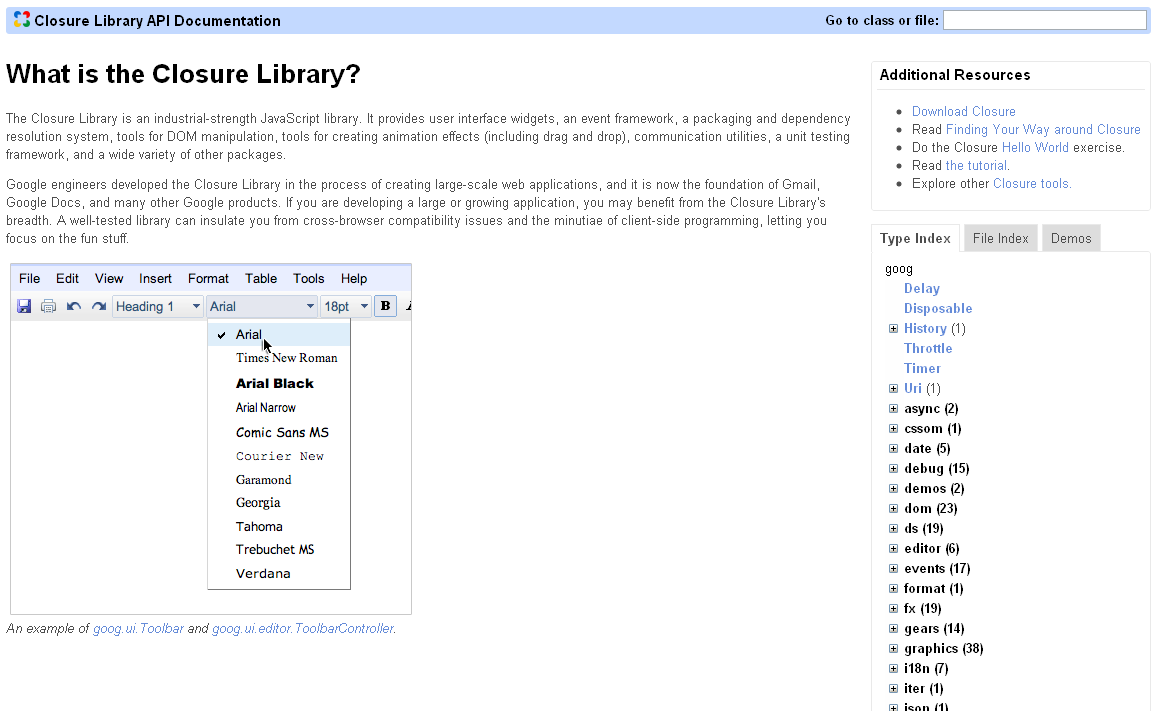
And here are two examples that show the usefulness of this approach (images above, in order of appearance):
- Creating a protocol specification with custom styling (example project page and source file)
- Creating advanced API docs (example project page and source file -- note: you will not be able to view the source file, access is being blocked somehow)
And that’s it. Go fancy-up your project sites and let me know if you know any other cool ways of extenting Google Code project hosting. @izuzak
Comments